All Courses & Ebooks
N 4,000
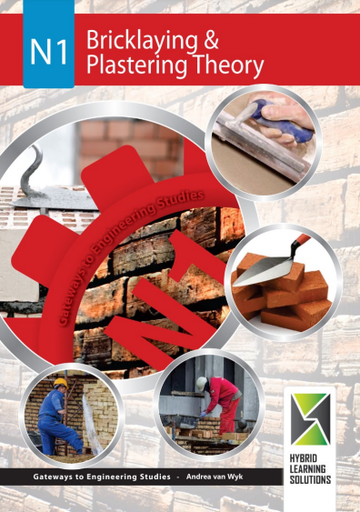
N1 Bricklaying and Plastering Theory is one of many publications introducing the gateways to Engineering Studies. This ebook is designed to develop the skills for learners that are studying toward an artisanship in the bricklaying and plastering related fields and to assist them to achieve their full potential.
This ebook, with its modular competence-based approach, is aimed at assisting facilitators and learners alike. With its comprehensive understanding of the engineering construction environment.
The subject mater is presented as worked examples in the problem-solving-result methodology sequence, supported by numerous and clear illustrations. Practical activities are included throughout the book. The author is one who is well known and respected in the manufacturing, engineering and related technology fields. Their extensive experience provides an excellent base for further study, as well as a broad understanding of the technology and the knowledge to succeed.
Author: Hybrid Learning Solutions
Yes, indeed! You can access the first chapter of this ebook for review prior to making a purchase.
Upon purchasing this ebook, you will be granted full access for a period of one year.
FREE
This video lesson explains the purpose and equipment used in a dynamic cone penetration (DCP) test, which estimates the institute CBR of soil in civil engineering. The DCP device comprises a vertical scale, drive road, cone, sliding attachment, and 8-kilogram hammer that is lifted and dropped to record penetration depth and number of blows required. The team then removes the drive road and equipment parts after determining the in-situ CBR strength.
FREE
In these video lessons the instructors demonstrate the compaction process for the Proctor Test using the modified compaction effort. They use the 4.5 kg rammer to compact the soil into three layers with 25 blows each, while carefully removing any excess soil from the top layer.
They then demonstrate how to extract the compacted soil sample from the mold and weigh it, as well as how to calculate the bulk density and dry density of the soil. The video lesson concludes with a discussion on the significance of the results obtained from the Proctor Test and their application in earthworks and construction projects.
FREE
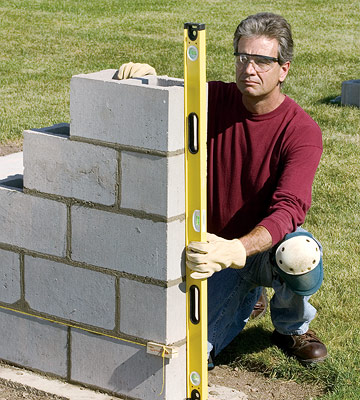
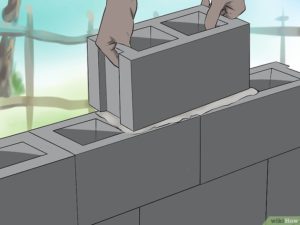
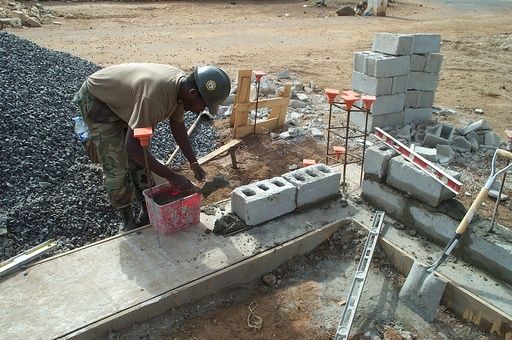
The video tutorial provides step-by-step instructions on how to build a block wall, including the tools needed such as a wheelbarrow, trowel, masonry hoe, and line blocks. The tutorial covers mixing mortar, preparing blocks, laying blocks with a lead and line, adding the enclosure, and laying a bond beam. The importance of leveling and plumbing the wall, as well as adding steel and filling the enclosure with mortar, is emphasized. Additionally, the video demonstrates how to use brackets and joint the wall with a concave joiner, while keeping the wall clean.
FREE
The video shows two different methods for laying blocks quickly and accurately. The first method involves using speed lead poles which are metal poles that are braced and plumbed on the corners. A string line is pulled between the poles to eliminate the need to freehand corners when laying blocks. This method saves time and ensures a perfectly level foundation up to 8 feet or higher. The video demonstrates how to set up the speed lead poles using 2x4s, steel square tubing, and C clamps, as well as how to establish a reference mark of elevation using a laser level.
The second method involves creating reference marks about 48 1/2 inches off the concrete footer, dropping down and making the actual marks, and hooking a string line to each line. The string lines are used to ensure the exact location and height of each row of block and provide a straight line to lay the block. The video also demonstrates how to move the string line up an 8-inch increment on each marked pole to keep the whole foundation level, even, and straight as it goes up. This method also ensures that the foundation is level and square, making it faster and easier to build a house.

FREE
The video appears to be a tutorial on how to spread mortar for block work using a bricklayer's trowel. The instructor explains the different parts of the trowel and demonstrates how to test if the mortar is of good consistency. The video emphasizes the importance of body positioning, holding the trowel correctly, and using the "loaf method" for spreading the mortar. The instructor also teaches the proper technique for spreading mortar on block work, paying attention to body mechanics and how to smear mortar on the block before applying a head joint. Overall, the video emphasizes the importance of correct techniques and form, prioritizing safety and health over speed.

FREE
This video provides a step-by-step guide on how to install wall bolts, which are expanding metal fixings designed for holding incredibly heavy loads in solid walls. The video covers the different types of wall bolts and the tools needed for installation. It demonstrates how to correctly drill the hole and how to fit and tighten the bolt onto the object being attached to the wall. The video also includes tips on removing the hole fitting and emphasizes the strength of wall bolts for fixing heavy objects.
FREE
Masonry Levels 1, 2 & 3 are vocational training programs that follow the National Skills Qualification Framework (NSQF). These programs are designed to equip individuals with the skills and knowledge necessary to become proficient in masonry. Level 1 is an introductory course that covers basic skills such as laying bricks, mixing mortar, and understanding different types of bricks and blocks. Level 2 builds on the foundational skills of Level 1 and teaches more advanced techniques such as masonry arches and decorative brickwork. Finally, Level 3 focuses on complex projects, including the construction of fireplaces, chimneys, and vaulted ceilings. Each level has a specific curriculum and a set of competencies that individuals must demonstrate to receive certification. The courses aim to provide hands-on experience and a theoretical understanding of masonry work, allowing individuals to enter the workforce with the necessary skills and knowledge.
National Occupational Standards for Construction/Building Trades in Nigeria - Masonry Levels 1, 2 & 3
Approved by the National Board for Technical Education (NBTE) - National Skills Qualification (NSQ), Nigeria
FREE
National Occupational Standards for Construction/Building Trades in Nigeria - Tiling & Decorative Stonework - Levels 1, 2 & 3.
Approved by the National Board for Technical Education (NBTE) - National Skills Qualification (NSQ), Nigeria

FREE
In this video lesson, you will learn how to expertly apply Venetian plaster step-by-step. The lesson will cover everything you need to know about preparing the supports, selecting the right tools, and using the correct technique to achieve a polished finish. You will learn how to mix primer and colorant to create your desired shade, and how to apply the plaster using a standard plastering trowel and stainless-steel spatula for subsequent coats and polishing.
The video also emphasizes the importance of using a 45-degree angle with pressure to run the spatula on the surface for polishing. Finally, you will learn how to apply wax to the surface for a shine and added protection.
N 4,000
N2 Bricklaying and Plastering Theory is one of many publications introducing the gateways to Engineering Studies. This ebook is designed to develop the skills for learners that are studying toward an artisanship in the bricklaying and plastering related fields and to assist them to achieve their full potential.
This ebook, with its modular competence-based approach, is aimed at assisting facilitators and learners alike. With its comprehensive understanding of the engineering construction environment.
The subject mater is presented as worked examples in the problem-solving-result methodology sequence, supported by numerous and clear illustrations. Practical activities are included throughout the book. The author is one who is well known and respected in the manufacturing, engineering and related technology fields. Their extensive experience provides an excellent base for further study, as well as a broad understanding of the technology and the knowledge to succeed.
Author: Nicholas Taylor, Hybrid Learning Solutions
Yes, indeed! You can access the first chapter of this ebook for review prior to making a purchase.
Upon purchasing this ebook, you will be granted full access for a period of one year.

FREE
This YouTube video provides a detailed demonstration of making interlocking stones in Nigeria. The process involves mixing sand, fine gravel, cement, and water in a specific ratio to produce a perfect mixture, which is poured into a lubricated mold. After 24 hours, the block is removed and sprinkled with water to harden over time. The video also provides helpful tips, including adding water to the mixture in bits to prevent the concrete from setting before filling the mold. The process produces around 150 interlocking stones from one bag of cement and 13 pans of sand mixture. The video ends by mentioning that the next section will focus on preparing the ground for the stones.
Interlocking paving stones, also known as interlocking pavers, are small slabs made of concrete or cement typically used in the construction of decks, driveways, walkways, patios and roads.
This video guide shows you how to make interlocking stones with material you can pick in the market. Save a lot of money by making your own interlocking stones.
FREE
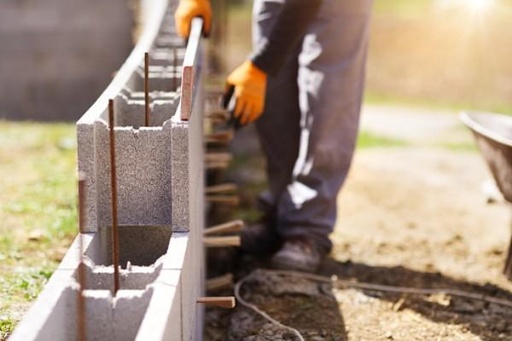
Masonry is the art and craft of building and fabricating in stone, clay, brick, or concrete block.
Setting out is the process of transferring the plan on paper to the actual ground or site of construction. A building is set out in order to clearly define the outline of the excavation and the line of the walls, so that construction can be carried exactly according to the plan.
In these video lessons you will learn;
- About the tools and equipment used within the masonry trade
- How to set out and the importance of doing so
FREE
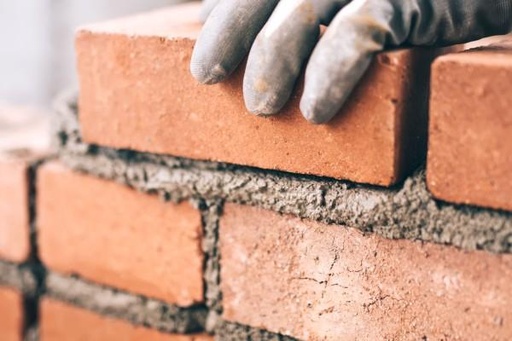
Masonry is the art and craft of building and fabricating in stone, clay, brick, or concrete block.
From these video lessons you will learn to;
- Identify the tools and materials that are used in the masonry trade
- Understand types of bonding
- Proper mixing of materials for building a wall with bricks and cement
- How to build a wall with bricks & cement

FREE
Hand tools are very essential for day-to-day jobs. They have been used by humans since ancient times to complete various useful tasks. Hand tools are of different types and can be used for any kind of work. Some tools are versatile and some of them are specifically used for a specific job.
These video lessons cover basic hand tools used in general construction.
Author: TEACH Construction Community Education
FREE
FREE
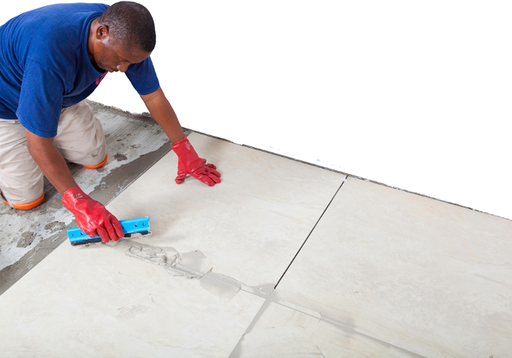
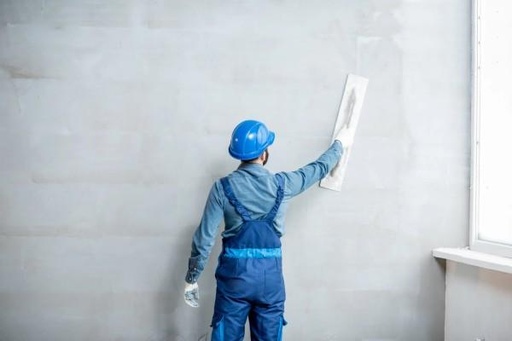
The video explains the process of wall plastering and the importance of covering rough surfaces with a thin coat of mortar. The plaster is applied in three coats, with the first being the base and the third being the finishing coat. The quantity of materials needed for each coat is calculated using specific ratios and formulas, and tools such as a spirit level, wooden float, and spade are essential for the job. The video also shows various tools and materials used for wall plastering, including a wooden box and a wheelbarrow.
FREE
Masonry is the art and craft of building and fabricating in stone, clay, brick, or concrete block.
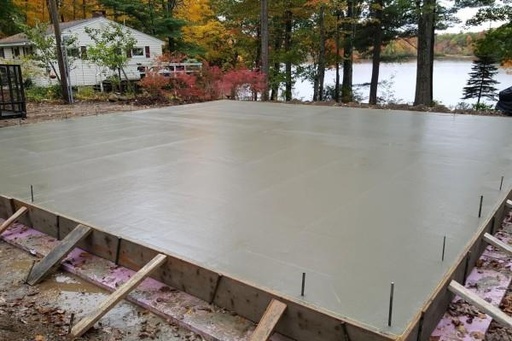
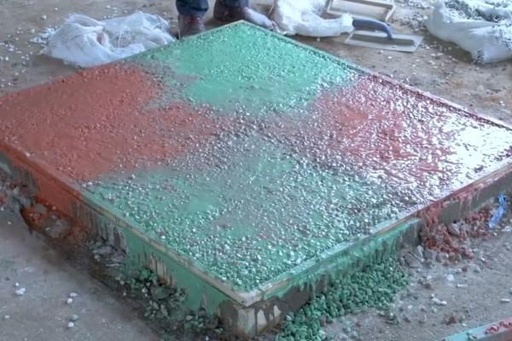
The video tutorial teaches how to build a reinforced concrete slab using a specific ratio of cement, sand, and coarse aggregates. The instructor explains the components of concrete and their role in the mixture, introduces the necessary tools and equipment, and stresses the importance of safety. The batching process for creating the concrete mix using the volume batching method with a standard wooden gorge box is explained, and the quantities of materials needed are determined based on the dimensions of the slab. The instructor concludes by asking participants to stay safe and signing off for the next session where they will begin the mixing process.

FREE
Masonry is the art and craft of building and fabricating in stone, clay, brick, or concrete block.
In this video on masonry work, the trainer discusses the equipment and materials needed for a subcorum framework footing and demonstrates the process of marking and cutting 11 pieces of 10mm diameter main bar for footing distribution using a steel cutter machine. The importance of precision in the cutting and marking process is highlighted, and the use of 6mm diameter for making syrup is briefly discussed. The video ends with an announcement of the upcoming session on bending.
FREE
Masonry is the art and craft of building and fabricating in stone, clay, brick, or concrete block.
These video lessons will show you how to perform the tasks essential to masonry, including plastering, bricklaying, identification of tools and materials of the trade and more. Learn cutting-edge techniques to provide you new skills that can boost your career in the construction trade.

FREE
The video explains the concept and purpose of levelling in surveying, defining terms like "reduced level" and "benchmark". The process of leveling and establishing points within a small plot is demonstrated, emphasizing the importance of setting up and leveling the instrument before taking measurements. The steps for setting up and leveling an instrument for masonry work are also explained, including focusing the objective and eyepiece to ensure clear and accurate measurements can be taken.

FREE
Masonry is the art and craft of building and fabricating in stone, clay, brick, or concrete block.
These video lessons will show you how to perform the tasks essential to masonry, including plastering, bricklaying, identification of tools and materials of the trade and more. Learn cutting-edge techniques to provide you new skills that can boost your career in the construction trade.
FREE
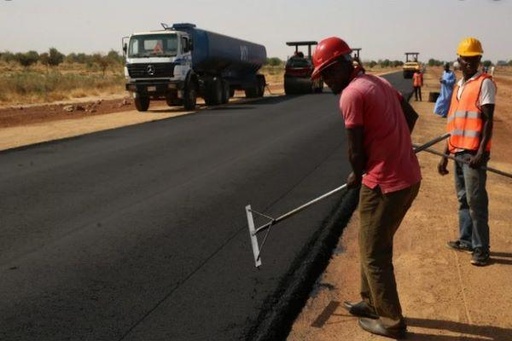
The video tutorial teaches how to properly set up and level equipment for road construction using a total station instrument. The tutorial covers the components of the total station, how to occupy a known point, leveling and orienting the instrument, data collection, stakeout of a point, and the importance of accurately measuring and setting out points for road construction. The worker emphasizes the importance of handling the expensive equipment with care and taking the time to ensure accurate measurements.
FREE
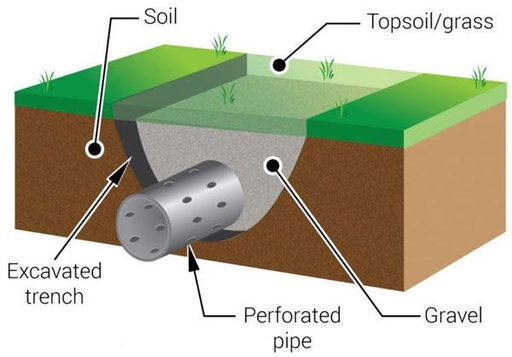
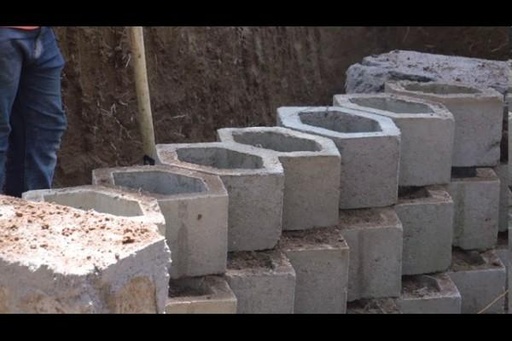
The video explains the importance of drainage systems in road construction and the installation process of perforated pipes. The video covers the excavation of trenches, installation of gravel, and laying of perforated pipes with 8mm diameter holes every 10cm. The video emphasizes the importance of low-pressure points and selecting appropriate materials to prevent obstructions. Additionally, necessary tools such as a spirit level, grab hammer, and chauffeur are discussed.

FREE
The video demonstrates the use of gabion retaining walls in road construction to provide stability and prevent soil from sliding. Gabions are wire mesh baskets filled with stones and create a retaining wall that can withstand slopes and allow for drainage. The video covers the tools and materials required for construction, such as compacting equipment, gabion baskets, and stones, and shows how to unfold gabion baskets, fill them with stones, and perform backfilling.
FREE
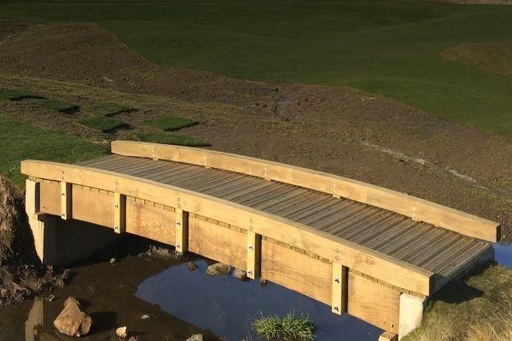
The video shows the Rwanda Polytechnic team constructing a wooden bridge. They discuss the personal protective equipment, tools, and materials they will use, including a concrete abutment and timber. The team levels the abutments, adds a timber headstock for support, and takes measurements to ensure the beam is centered and level. They also measure the distance between two boards and use a jigsaw to cut the wood after ensuring it is connected to electricity.
FREE
The video demonstrates the construction process of a honeycomb retaining wall for road construction at Rwanda Polytechnic. The first step involves laying a base of gravel and sand, followed by compacting the soil using a plate compactor machine. Instructor Eugene introduces the necessary tools, equipment, and materials required for the job, such as a plastic mallet, chisels, and safety goggles. Additionally, the video provides a tutorial on starting and operating a machine used for optimum compaction during the construction process. The honeycomb retaining wall is designed to prevent soil erosion and aid in drainage.