All Courses & Ebooks
FREE
This video lesson showcases the use of a manual bending machine, also known as a folding machine, for bending metal to achieve the desired angle. The instructor emphasizes the importance of precision in measurements and markings to ensure accurate bends.
The lesson provides step-by-step instructions on marking reference lines, measuring and reducing distance, and adjusting the angle to produce the necessary bend. The lavas used for fabrication and the top of the door or window are also discussed in accordance with the required angle. The process of bending rovers is demonstrated, highlighting the importance of aligning and adjusting correctly and cleaning the machine, tools, and material after each work session.
FREE
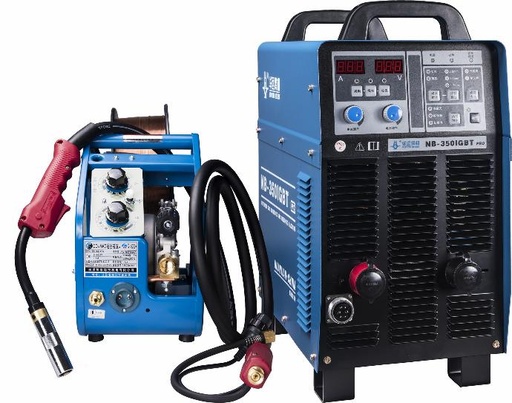
This video lesson discusses the process of welding a butt joint on both sides using a MIG welding machine. The instructor highlights the importance of checking the machine's condition and adjusting the gas flow before welding.
FREE
This video lesson discusses using a four-roller machine to create cylindrical shapes in welding. The instructor explains how to use parallel line development to create the cylinder shape, how to divide the base into 12 equal parts, and discusses the different types of welding machines.
The video features a practical demonstration of a four-roller machine with handles that can be used for driving or holding the workpiece in place. The rollers can be adjusted to increase or reduce the circumference or height of the cylinder. Proper alignment is necessary for quality results, and the distance between the rollers can be adjusted for varying thicknesses. The instructor explains how to load the workpiece onto the rolling machine, how to roll the cylindrical shape, and how to adjust the rollers to get a perfect circle. The video provides an introduction to the manual rolling machine and explains how to use it to create cylindrical shapes.
FREE
This video lesson explains the equipment and differences between Flux Core Arc Welding (FCAW) and MIG welding equipment. FCAW uses a covered electrode with flux inside, and the video shows how to insert it into the welding machine and connect the gun. The lesson also covers setting up the FCAW equipment, preparing it for welding with flux and shiny glasses, and adjusting the machine and S cable.
FREE
The video lesson discusses the different names for MIG/MAG welding depending on the gas used, with co2 being called metal active gas welding and inert gases like argon being referred to as metal inert gas welding. The equipment required for MIG/MAG welding is covered, including the welding machine, wire feeder, co2 cylinders, flow meter, and cables.
The lesson explains how to set up the equipment, manipulate and change the electrode for different workpieces, and adjust the gas flow and other settings for MIG MAG welding. It also emphasizes the importance of safety and turning off the machine after use.
FREE
This video tutorial covers the setup and use of TIG welding equipment. It explains the different colours of tungsten electrodes used for welding and their classification, as well as the equipment required, including a welding machine, a cylinder containing argon gas, a pressure regulator, and flow meter.
The instructor also demonstrates how to set up the TIG welding equipment, including the use of a tungsten electrode, how to strike an arc and the importance of safety precautions. The video emphasizes the importance of practice to develop the required skills for welding.
FREE
National Occupational Standards for Construction/Building Trades in Nigeria - Welding & Fabrication - Levels 1, 2 & 3.
Approved by the National Board for Technical Education (NBTE) - National Skills Qualification (NSQ), NigeriaApproved by the National Board for Technical Education (NBTE) - National Skills Qualification (NSQ), Nigeriaonal Occupational Standards for Construction/Building Trades in Nigeria - Welding & Fabrication - Levels 1, 2 & 3.
Approved by the National Board for Technical Education (NBTE) - National Skills Qualification (NSQ), Nigeriaational Occupational Standards for Construction/Building Trades in Nigeria - Welding & Fabrication - Levels 1, 2 & 3.
Approved by the National Board for Technical Education (NBTE) - National Skills Qualification (NSQ), Nigeria
FREE
The Youth Explore Trades Skills Activity Plans are teacher resources designed to help students explore careers in trades and skills-related disciplines.
These activity plans are specifically designed to introduce students to trades and skills through activities that provide valuable hands-on experience. Through exposure to modules like these students will be able to make better informed career decisions.
The resource introduces students to the fields of metalworking and manufacturing, and provides units in fabrication, welding, and machining. Each unit is built in self-contained modules that will equip both new and experienced teachers with easily navigable, ready-to-use lessons.
Author: Industry Training Authority Apprenticeship Programs, British Columbia

N 4,000
Fitting & Machining N1 Revised is one of many publications introducing the gateways to Engineering Studies. This ebook is designed to develop the skills for learners that are studying toward an artisanship in Fitting and Machining related fields and to assist them to achieve their full potential.
This ebook, with its modular competence-based approach, is aimed at assisting facilitators and learners alike. With its comprehensive understanding of the engineering construction environment.
The subject mater is presented as worked examples in the problem-solving-result methodology sequence, supported by numerous and clear illustrations. Practical activities are included throughout the book. The author is one who is well known and respected in the manufacturing, engineering and related technology fields. Their extensive experience provides an excellent base for further study, as well as a broad understanding of the technology and the knowledge to succeed.
Author: John Dillon, Hybrid Learning Solutions
Yes, indeed! You can access the first chapter of this ebook for review prior to making a purchase.
Upon purchasing this ebook, you will be granted full access for a period of one year.
N 4,000
Fitting & Machining N2 Revised is one of many publications introducing the gateways to Engineering Studies. This ebook is designed to develop the skills for learners that are studying toward an artisanship in Fitting and Machining related fields and to assist them to achieve their full potential.
This ebook, with its modular competence-based approach, is aimed at assisting facilitators and learners alike. With its comprehensive understanding of the engineering construction environment.
Author: John Dillon, Hybrid Learning Solutions
Yes, indeed! You can access the first chapter of this ebook for review prior to making a purchase.
Upon purchasing this ebook, you will be granted full access for a period of one year.
N 4,500
Machines & Properties of Metal N4 is one of many publications introducing the gateways to Engineering Studies. This ebook is designed to develop the skills for learners that are studying toward an artisanship in engineering and manufacturing related fields and to assist them to achieve their full potential.
This ebook, with its modular competence-based approach, is aimed at assisting facilitators and learners alike. With its comprehensive understanding of the engineering construction environment.
Author: Nicholas Taylor, Hybrid Learning Solutions
Yes, indeed! You can access the first chapter of this ebook for review prior to making a purchase.
Upon purchasing this ebook, you will be granted full access for a period of one year.
N 4,000
Metalwork Theory N1 is one of many publications introducing the gateways to Engineering Studies. This ebook is designed to develop the skills for learners that are studying toward an artisanship in welding and fabrication related fields and to assist them to achieve their full potential.
This ebook, with its modular competence-based approach, is aimed at assisting facilitators and learners alike. With its comprehensive understanding of the engineering construction environment.
Author: Nicholas Taylor, Hybrid Learning Solutions
Yes, indeed! You can access the first chapter of this ebook for review prior to making a purchase.
Upon purchasing this ebook, you will be granted full access for a period of one year.
FREE
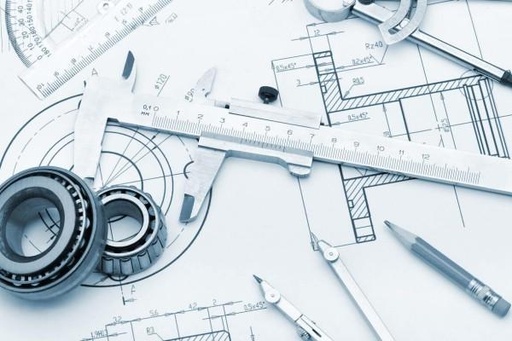
Interpreting metal fab drawings is a training handbook that introduces the principles of interpretation and application of industrial fabrication drawings.
Basic principles and techniques of metal fabrication are introduced by planning and construction of fixtures used in fabrication from drawings. Basic tools and equipment for layout fitting of welded fabrications are utilized. Covers the use and application of the AWS welding symbols. This course handbook will utilize blueprints and welding symbols and will apply them in classroom and in shop as practical assignments.
Author: Cameren Duke Moran
FREE
In the video, a welding instructor demonstrates how to set up a Shielded Metal Arc Welding (SMAW) machine for sheet metal welding. He explains the components of the AC welding machine, how to connect the electrode and ground cables, and the accessories used in welding. The instructor also introduces the electrode used for welding, provides information on the amperage range for welding, and explains how to adjust the current for different electrodes. The video offers a comprehensive guide to setting up and using an SMAW welding machine for sheet metal welding.

FREE
The Rwanda Polytechnic welding course explains the advantages and disadvantages of welding as a metal joining process. The video then focuses on oxyacetylene gas welding, describing it as a fusion welding method that requires proper use of gases and equipment to successfully form a permanent joint. The instructor explains that acetylene and oxygen are used to produce maximum heat, and the selection of gases depends on several factors such as the material being welded and the required temperature. The video also discusses the disadvantages and limitations of manual welding, including the need for specialized training and fixtures to hold the metal pieces together.

FREE
The video teaches how to properly light and switch off an oxyacetylene gas torch for welding. It covers the use of a cylinder key, pressure regulation, nozzle cleaning, and flame types. Safety precautions such as wearing goggles and keeping the cylinder key nearby are emphasized. The steps to safely shut off the welding torch are also explained, including releasing the remaining gas in the hose pipe. Different types of flames are discussed, each with varying temperatures and used for different purposes in oxyacetylene gas welding.
FREE
The video showcases an instructor's demonstration of a bead weld in the down hand position using shielded metal arc welding. The instructor covers safety precautions, uses a welding machine, cables, s clamp, electrode cable, chipping hammer and brush, and helmet. The welding position requires minimal safety measures, and the demonstration concludes with cleaning up the welded bead using a wire brush and chipping hammer.
FREE
The video demonstrates the process of creating a butt joint using TIG welding, emphasizing safety precautions such as proper grounding and using safety shields. The instructor explains the process of adjusting the current and gases before starting welding and demonstrates the procedure of creating a clean butt joint in 1G down hand position. The video ends with a reminder to switch off the welding machine and clean and organize the work area.
FREE
The video teaches how to create a butt joint using the TIG welding process. The instructor shows how to insert the tungsten electrode correctly, adjust the current and gases, and emphasizes safety precautions. The process of creating the butt joint in 1G down hand position is demonstrated, starting with edge preparation and tacking before filling the joint with filler metal. The finished product is a clean weld that does not require excess cleaning. The video ends with a reminder to switch off the welding machine and clean and organize the working area.
FREE
In this welding tutorial video, the instructor demonstrates how to create a butt joint on both sides at a 45-degree angle using the SMAW welding process. They begin by discussing the importance of choosing the correct electrode for the job and ensuring that the welding machine is properly set up. The instructor then shows how to properly prepare the edges of the metal pieces before clamping them together. They emphasize the importance of using proper clamps to hold the pieces in place during welding. The welding process is demonstrated, starting with the initial tack welds and then moving on to filling the joint with filler metal. The instructor explains how to control the welding arc and adjust the amperage during the welding process. They also discuss the importance of maintaining a consistent travel speed while welding. The finished weld is inspected and the video ends with a reminder to properly clean up the work area and equipment.
FREE
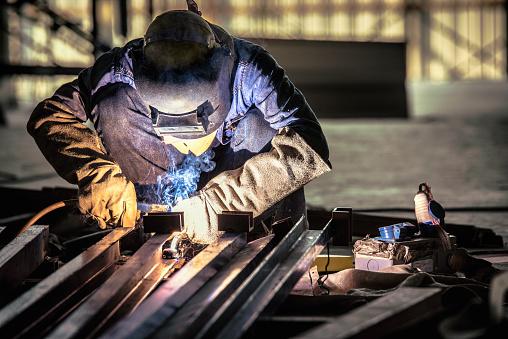
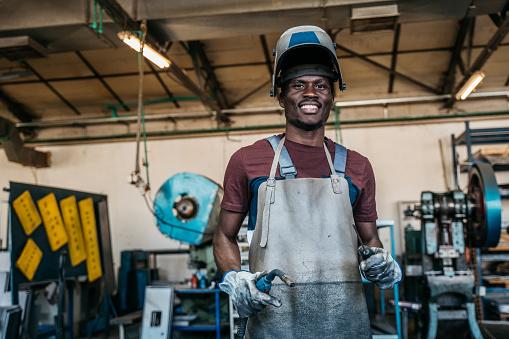
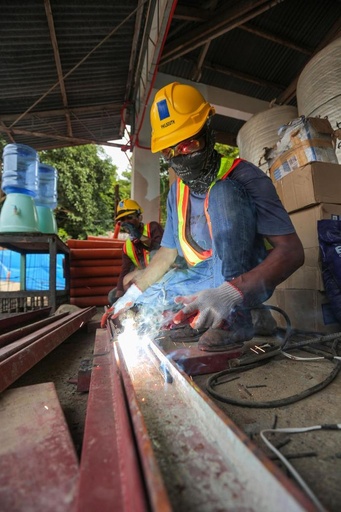
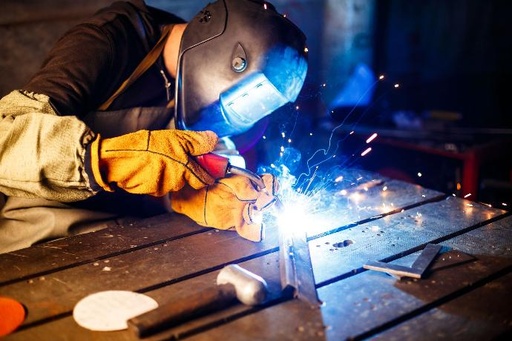
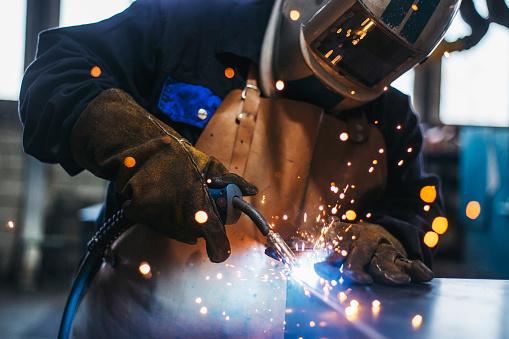
Welding is an important industrial and mechanical process. Welding is a fabrication process whereby two or more parts are fused together by means of heat, pressure or both, forming a join as the parts cool.
Welders cut, join and shape metal plate, pipework and composite materials in the aerospace, construction and civil engineering industries.
These online welding lessons cover the fundamentals of industrial welding.
FREE
This video tutorial is about inserting, removing, cutting, and grinding discs in welding. The instructor starts by showing the various types of discs used in welding, including cutting discs, grinding discs, and flap discs, among others. The instructor then demonstrates how to insert and remove the discs from an angle grinder, including how to use the spindle lock to secure the disc. They emphasize the importance of safety when inserting and removing the discs and warn against using damaged or worn-out discs.
Next, the instructor demonstrates how to use the cutting disc to cut through metal, showing proper positioning and technique to achieve a clean cut. They also show how to use the grinding disc to smooth rough edges and how to use the flap disc for finishing and polishing. The instructor gives tips on how to achieve a smooth finish and how to avoid overheating the metal during the grinding process.
The video also covers safety precautions when using discs, such as wearing proper personal protective equipment, keeping a safe distance from the workpiece, and avoiding loose clothing or jewelry that could get caught in the grinder. Finally, the instructor provides some tips on how to extend the life of the discs by storing them properly and avoiding excessive force or pressure during use.
FREE
In this welding video, the instructor demonstrates how to perform a 1F lab joint using the stick welding process. The 1F lab joint involves welding two pieces of metal perpendicular to each other. The instructor starts by explaining the importance of selecting the correct electrode and setting the machine to the correct polarity. The instructor then shows how to properly prepare the metal pieces for welding, including cleaning, beveling, and tacking the joint. The welding process involves running a series of short beads along the joint, alternating between the two sides to prevent warping. The instructor also provides tips on maintaining a consistent arc length and electrode angle for a strong, clean weld. The finished product is a solid 1F lab joint that is ready for further use.

FREE
In this video, the instructor demonstrates how to cut metal using a shear cutting machine. The video begins with an introduction to the machine and its components. The instructor emphasizes the importance of safety and demonstrates how to properly secure the workpiece in the machine. The video shows the proper techniques for cutting straight lines, curves, and circles using the machine. The instructor provides tips on how to achieve a clean cut and how to properly adjust the cutting blades. The video also covers the maintenance of the machine, including how to keep the blades sharp and how to properly oil the machine. The video ends with a reminder to clean up the work area and properly store the machine.
N 4,000
N2 Welder's Theory is one of many publications introducing the gateways to Engineering Studies. This ebook is designed to develop the skills for learners that are studying toward an artisanship in welding and fabrication related fields and to assist them to achieve their full potential.
This ebook, with its modular competence-based approach, is aimed at assisting facilitators and learners alike. With its comprehensive understanding of the engineering construction environment.
The subject mater is presented as worked examples in the problem-solving-result methodology sequence, supported by numerous and clear illustrations. Practical activities are included throughout the book. The author is one who is well known and respected in the manufacturing, engineering and related technology fields. Their extensive experience provides an excellent base for further study, as well as a broad understanding of the technology and the knowledge to succeed.
Author: Nicholas Taylor, Hybrid Learning Solutions
Yes, indeed! You can access the first chapter of this ebook for review prior to making a purchase.
Upon purchasing this ebook, you will be granted full access for a period of one year.
FREE
In this video, the instructor demonstrates the process of oxyacetylene gas cutting in welding. This process involves using a gas torch and a high-temperature flame to cut metal. The instructor explains the components of the cutting torch, including the oxygen and acetylene tanks, regulators, and hoses. They also emphasize the importance of safety, such as wearing protective clothing and checking the work area for potential hazards. The instructor then explains the proper technique for lighting the torch and adjusting the flame to the desired temperature. They demonstrate how to properly hold and move the torch to cut through metal, as well as how to deal with common issues such as backfire and flashback. The video concludes with a reminder to turn off the gas and properly store the equipment after use.
FREE
In this video, the instructor demonstrates how to perform a 1G weld. The 1G position is where the pipe is in a horizontal position, and the weld is performed in a flat position. The instructor explains the importance of safety precautions, such as wearing protective clothing and positioning the welding machine away from flammable materials. He then demonstrates the process of preparing the metal surface, setting up the machine, and positioning the electrode for welding. He also emphasizes the importance of using the correct amperage for the thickness of the metal being welded. The instructor then demonstrates the process of welding, moving the electrode in a circular motion to create a clean and uniform weld bead. Finally, he explains the importance of post-weld cleaning and inspection to ensure the quality of the weld.
FREE
In this video, the instructor demonstrates how to perform a tee joint in the 1F position using the Gas Tungsten Arc Welding (GTAW) process. The instructor explains the setup and preparation required for welding the tee joint, including selecting the appropriate welding machine and ensuring proper grounding. They also discuss the importance of safety measures such as wearing proper welding gear and positioning the workpiece at a comfortable height.
The welding process starts with the edge preparation, where the instructor shows how to properly clean and bevel the edges of the workpieces. They then tack the workpieces in place and demonstrate how to control the heat input using the foot pedal and filler rod. The instructor emphasizes the importance of maintaining a consistent weld pool and avoiding overheating the workpiece.
Once the joint is fully welded, the instructor demonstrates how to properly clean and inspect the finished weld to ensure it meets industry standards. The video concludes with a summary of the key steps involved in welding a tee joint in the 1F position using the GTAW process.
FREE
In this video, the instructor demonstrates how to create a tee joint brazed joint. The brazing process involves using a filler metal with a lower melting point than the base metal being joined and heating the workpieces to a temperature that allows the filler metal to melt and flow into the joint. The instructor discusses the importance of cleaning the workpieces thoroughly to remove any oils or contaminants that could affect the brazing process. They then demonstrate how to properly position and clamp the workpieces before applying flux to the joint. The flux helps to prevent oxidation and promotes wetting of the filler metal. The instructor then shows how to heat the joint using a brazing torch and apply the filler metal to the joint. The finished product is a strong, clean joint that does not require excess cleaning. The video ends with a reminder to turn off the torch and properly clean up the work area.

FREE
In welding, a 1F tee joint is a type of joint where one of the pieces is perpendicular to the other, and the joint is formed at the intersection. In this video, the instructor demonstrates how to perform a 1F tee joint using shielded metal arc welding (SMAW). The process begins with preparation of the base metal, which involves cleaning and beveling the edges. The instructor emphasizes the importance of proper electrode selection, which is dependent on the base metal, and demonstrates how to insert the electrode into the welding machine and adjust the amperage. The welding process is then demonstrated, starting with a tack weld before filling the joint with filler metal. The instructor explains how to control the penetration and ensure a sound weld, and highlights the importance of safety measures such as wearing appropriate protective gear and maintaining a safe work environment. The finished product is a strong, clean weld that is ready for further use.
FREE
In this video, a 2F Tee joint is formed when two metal plates are joined perpendicular to each other, creating a T shape. In this level 5 welding process, the joint is welded from the front side or the top side, hence it is called a 2F Tee joint. The joint preparation process involves cutting the metal plates to size, grinding the edges, and cleaning the surfaces. The welding process involves setting up the welding machine, positioning the plates, and tacking the plates to hold them in place. The welder then proceeds to weld the plates, moving the electrode in a circular motion to fill the joint with the molten filler metal. Careful attention is given to maintain the correct heat and speed to ensure that the weld is of high quality. The finished product is a strong, durable weld that can be used in a variety of applications.
FREE
In this video, the instructor demonstrates how to bend a gutter using a metal forming machine. The machine used is a combination of a metal brake and a roll former that allows for the bending of sheet metal in different configurations. The instructor starts by explaining the different parts of the machine and the various adjustments that can be made to it. Safety precautions such as wearing gloves and safety glasses are emphasized before proceeding with the bending process. The instructor then demonstrates the proper technique for loading and feeding the sheet metal into the machine. They then adjust the machine settings to produce the desired angle and shape of the gutter. The finished product is a bent and formed gutter that can be used for various purposes such as drainage or roofing. The video concludes with a reminder to clean up the work area and switch off the machine.